Showing posts with label cookies. Show all posts

Tuesday, November 8, 2011

Pumpkin Baking Fest

Unexpected day off from school today and I don’t feel like studying any more for my peds final than I had planned to so... time to catch up on blogging lol My friend Jenny had a bunch of pumpkins leftover from Halloween so we decided to do a pumpkin themed baking fest. Obviously I didn’t want to study for my final and baking is always the answer to procrastination haha  So we decided on pumpkin snickerdoodles and pumpkin cheesecake brownies...yumm


Pumpkin Snickerdoodles- recipe adapted from baked perfection

3 cups flour
2 tsp cream of tartar
1 tsp baking soda
½ tsp salt
1 tsp pumpkin pie spice (i just mixed together a 1:1 ratio of cinnamon and nutmeg)
1 cup butter (2 sticks), softened
1.5 cups sugar
1 egg
¾ cup pumpkin puree (can either be fresh or canned pumpkin)

¼ cup sugar
2 tsp cinnamon

-combine dry ingredients (flour, cream of tartar, baking soda, salt, and pumpkin pie spice) in a bowl and set aside
-cream butter and sugar until light and fluffy
-add egg and pumpkin puree; mix until combined
-add dry ingredients in portions, mixing well after each addition
-chill dough for at least an hour before using it

-mix together remaining sugar and cinnamon in a small bowl
-roll dough into one inch ball and coat with cinnamon sugar mixture
-space them about 2 inches apart on baking sheet
-bake at 350 for 12-15 min
-cool for 5 min before removing from baking sheet


Pumpkin Cheesecake Brownies- recipe adapted from cookie madness

For the pumpkin cheesecake filling:
12 oz cream cheese, softened
6 tbsp light brown sugar
2 tbsp granulated sugar
¾ cup pumpkin puree
2 eggs
½ tsp vanilla extract
¾ tsp pumpkin pie spice
2 tbsp flour

For the brownie:
1 cup butter (2 sticks), softened
¼ tsp salt
1.5 cups granulated sugar
3 eggs
1 tsp vanilla extract
1.5 cups semisweet chocolate chips, melted and cooled
1 cup flour

-make the filling first
-cream together cream cheese and both sugars
-add eggs, vanilla, and pumpkin puree
-stir in flour and set aside

-melt chocolate chips, set aside to cool
-cream together butter, salt, and sugar until light and fluffy
-add eggs and vanilla
-stir in melted chocolate
-add flour

-pour ¾ of the brownie batter into a greased 9 inch square pan
-pour pumpkin mixture evenly over the brownie batter
-drop leftover brownie batter in spoonfuls over the pumpkin layer
-swirl with a knife if desired
-bake at 350 for 45-50 min or until a toothpick comes out clean
-cool for a couple hours at room temp and then chill overnight


Wednesday, September 28, 2011

Peanut Butter Galore

trade off...i make cookies for Liz, she makes me dinner. good deal considering i will take any opportunity to bake esp if everything is provided for me (and i don’t have to do dishes!) and i get food i can’t normally make with just my hot plate in my dorm room haha Liz is a peanut butter fanatic so the request was for peanut butter chocolate chip cookies. recipe adapted from southernfood.com


1/2 cup (1stick) butter, softened
1/2 cup smooth peanut butter
1/2 cup granulated sugar
1/2 cup light brown sugar, firmly packed
1 egg
1 1/4 cups all-purpose flour
1/2 tsp baking powder
1/2 tsp baking soda
1/4 tsp salt
1 cup semisweet chocolate chips

-cream together the butter, peanut butter and sugars until light and fluffy
-add the egg and mix thoroughly
-in a separate bowl, mix together the flour, baking powder, baking soda, and salt
-gradually add these dry ingredients to the butter mixture
-add the chocolate chips
-drop cookie dough by spoonfuls onto lightly greased baking sheets
-bake at 375 for 10-12 mins

Monday, August 15, 2011

Cookies for Breakfast!

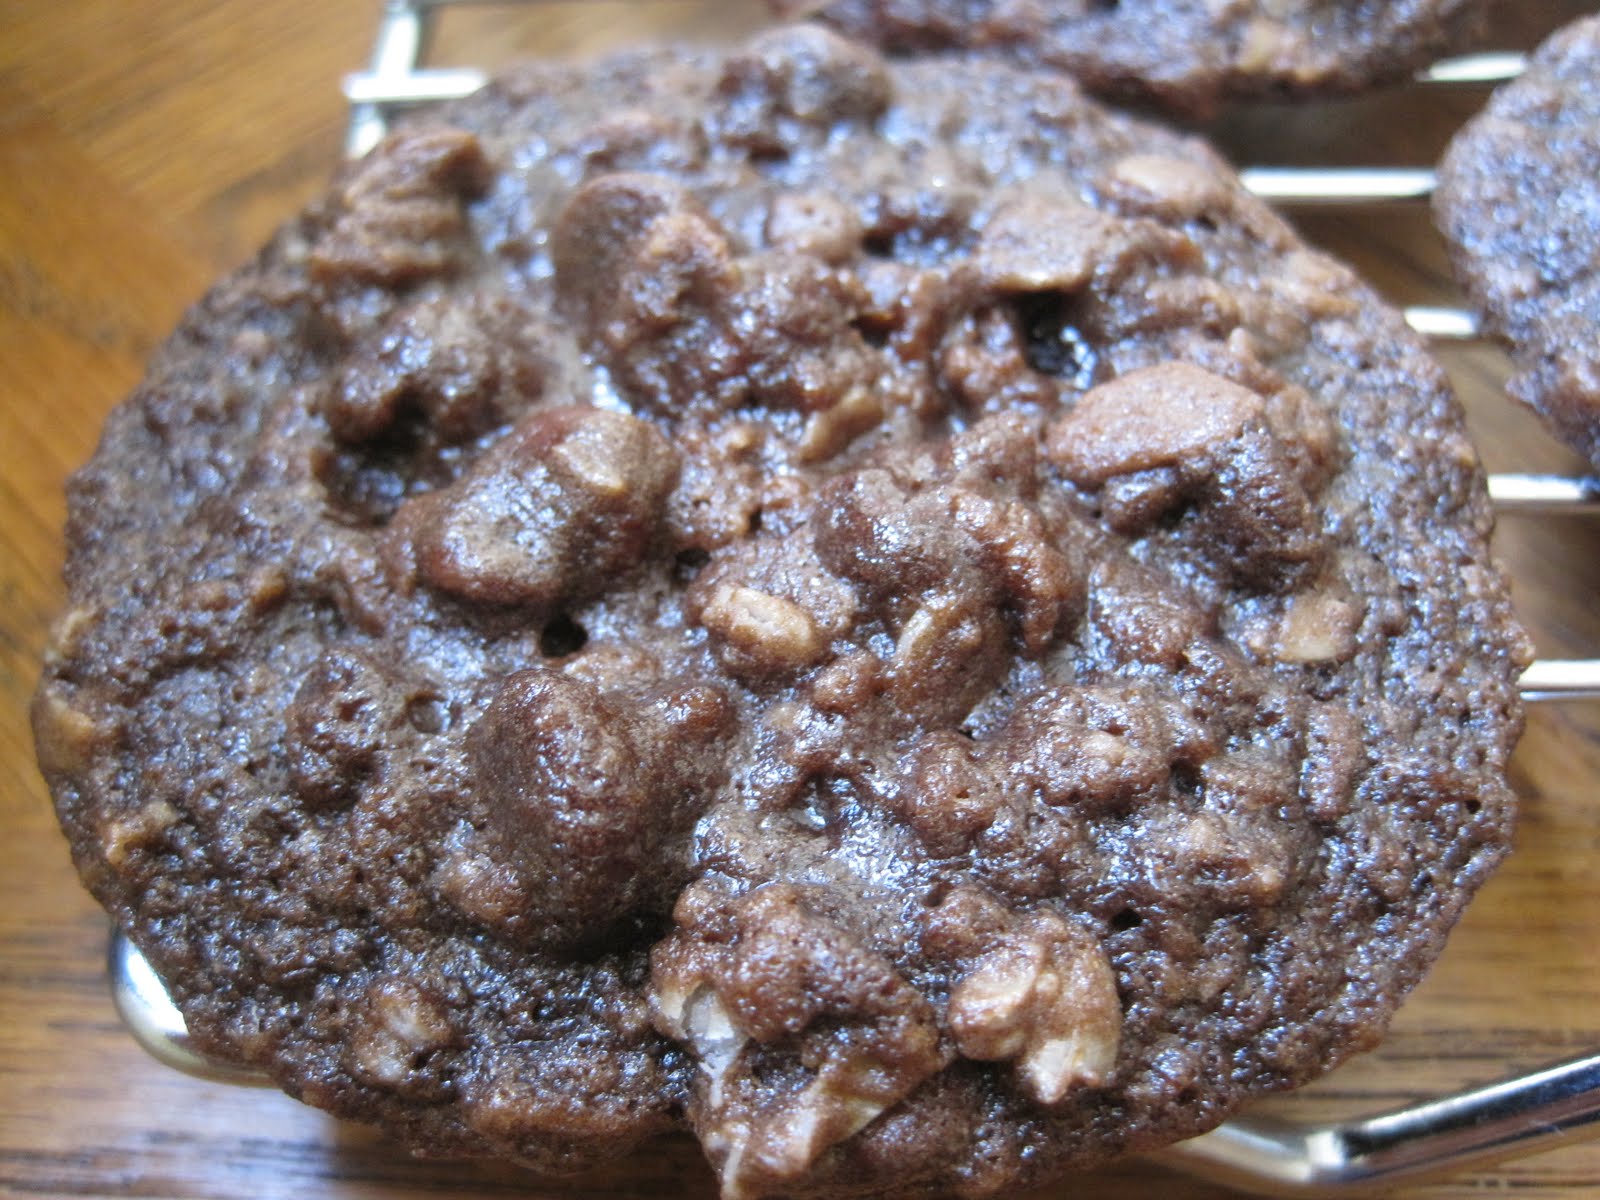
Cookies for breakfast? Any cookie that has oatmeal in it qualifies in my opinion haha I made these double chocolate chip oatmeal cookies for my trip to San Diego along with oreo chocolate chip cookies... gotta have something healthy to balance out the oreos right? If you like super chewy and chocolate-y cookies, these are perfect for you! Recipe from itsybitsyfoodies


1 cup butter, softened
1 cup brown sugar
½ cup sugar
2 tsp vanilla
2 eggs
1¼ cup flour
½ cup cocoa powder
1 tsp baking soda
2 cups oats
2 cups semi-sweet chocolate chips

-Cream together butter and both sugars.
-Mix in the vanilla and eggs.
-Stir in the flour, cocoa powder, and baking soda until just incorporated.
-Gradually add in the oats and chocolate chips.
-Drop the dough by spoonfuls onto a baking sheet.
-Bake for about 8 min or until they are just set.

Sunday, July 31, 2011

Baking During Finals = Necessary

Finals without baking cookies?! Unheard of...at least in my world that is lol since I live in the dorms, I don’t have a kitchen of my own but luckily my friend who lives close by offered her kitchen for me to use to cure the insanity of studying for finals. I’m really grateful to my friend for letting me use her kitchen but it really isn’t the same as having my own kitchen/supplies/baking utensils. So I had to look for a recipe that asked for the ingredients she had on hand (basic cookie recipes, nothing fancy) so we wouldn’t have to go out at 1 am to get supplies haha and living where we live (Washington Heights, New York) that isn’t a very good idea. After looking through my bookmarked recipes, I found this oreo chocolate chip cookie one which was perfect since I remember my friend offering me an oreo the week before when I was at her place.

Cookies are always the best in the middle of the night :D

-1 stick butter, softened
-6 tbsp sugar
-6 tbsp brown sugar
-1 egg
-1 tsp vanilla
-1¼ cup flour
-½ tsp baking soda
-½ tsp salt
-11 oreo cookies, crushed
-1 cup chocolate chips

Cream butter and sugars until light and fluffy.
Add egg and vanilla well mixed.
Sift together flour, baking soda, and salt in a separate bowl.
Add dry ingredients in three portions to wet ingredients, mixing well after each addition.
Stir in oreos and chocolate chips until just combined.
Drop dough by spoonfuls onto baking sheet.
Bake for 10 minutes at 350 or until light brown on the edges, but still soft.
Let cookies cool on baking sheet for 3 minutes before transferring to cooling rack.


What I’ve learned about baking cookies in New York that I think is pretty great is that it only takes 15 min for butter to soften because IT IS SO HUMID lol back in California, it takes 1-2 hours for butter to soften enough for me to cream but here in New York, we took the butter out of the fridge and 15 min later, it was ready to go. Awesome! BUT it still doesn’t make up for it being 100 degrees with insane humidity and when you open those oven doors, that rush of heat is almost unbearable. And then that heat sorta just sits in the kitchen and you have to get the hell outta there ASAP after the cookies are done lol But baking at 1 am definitely got me back into studying mode, baking is the answer to stress, lack of focus, info overload, and being brain dead... at least for me it is. So thank you Rolana for giving me the pick me up that I needed :)

Tuesday, May 17, 2011

Keys

I recently attended a wedding in the Florida Keys (Islamorada, to be specific).  The guest-gift was a bag of delicious key lime cookies.  I knew immediately that my next project would be recreating them.

I started with a basic sugar cookie recipe, but replaced the tbsp of half and half with key lime juice.  When that didn't taste lime-y enough, I added the contents of two more limes (so probably about 1.5 tbsp total juice).

I also decided to add coconut to contribute to the "tropical" flavor of the cookies.  I don't think the originals had coconut, that's just my little twist.


Note to self (and internet) next time, I should try this with pineapple juice and coconut...then add a teaspoon of rum instead of extract.


Key lime cookies
0.5 cup unsalted butter, whipped in standing mixer.
1 cup sugar
2 eggs
1.5 tbsp key lime juice
2.5 cups flour
pinch of salt
2 tsp baking powder
1/2 tsp extract (this time I used almond...but I forgot that I have coconut.  If I were to make them again, I'd use coconut)
Handful of shredded, sweetened coconut (This is really a personal taste thing.  If you hate coconut, don't add any.  If you love it, add two handfuls)

Distribute on cookie sheet and flatten.  Sprinkle with sugar and brush with key lime juice.

Bake at 400 for about 11 minutes

In the future, I might add more key lime juice as well as some slivers of white chocolate. I'm not a fan of white chocolate, but I think some slivers of it might add a certain creaminess that these cookies need.

Wednesday, April 27, 2011

White Chocolate... Again

I’m going to see my socal friends this weekend which means there’s a need to make something with white chocolate... those boys haha I ran out of macadamia nuts and I didn’t have time to run to the store this week so I settled on making these white chocolate chip cookies. Again, hating things that are too sweet, I purposely made the batter less sweet knowing I was going to be using white chocolate which is uber sweet. We’ll see if them boys like these in replacement to their usual white chocolate macadamia nut cookies lol

recipe adapted from allrecipes... I halved the recipe which makes about 30

-1/2 cup butter, softened
-1 cup sugar
-1 egg
-1 tsp vanilla extract
-1 cup flour
-1/3 cup cocoa powder
-1/2 tsp baking soda
-1/4 tsp salt
-3/4 cup white chocolate chips or chunks

sift together the dry ingredients in a bowl (flour, cocoa powder, baking soda, and salt), set aside
cream together the butter and sugar until light and fluffy
add egg and vanilla
add the dry ingredients a couple spoonfuls at a time
fold in the white chocolate
refrigerate the cookie dough for at least an hour before using it
drop by spoonfuls (or use a melon baller) onto baking sheets
bake at 350 for 8-10 min
let the cookies sit on the baking sheet for about 2 min (finish baking)  before transferring them to cooling racks


Saturday, April 16, 2011

Totoro Cookies

When I saw my sister over spring break, she showed me her newly painted totoro nails and I thought it was the cutest thing ever.


f you don’t know who Totoro is, he’s this furry cartoon character from a Studio Ghibli (Japanese) movie called well... My Neighbor Totoro haha So I got this idea to make totoro cookies since my nail painting skills are terrible. The base is a simple sugar cookie recipe but making the colors for the icing and painting the cookies was the hard part. Luckily, my cousin was here visiting this past weekend so I had some help.

Sugar Cookie Recipe adapted from allrecipes... I basically just halved the recipe since I thought 60 would be way too many

-3/4 cup (6 tbsp) butter, softened
-1 cup sugar
-2 eggs
-1/2 tsp vanilla extract
-2.5 cups flour
-1 tsp baking powder
-1/2 tsp salt

Sift together the dry ingredients and set aside
Cream together the butter and sugar
Add eggs and vanilla extract
Slowly add in the dry mixture, mix well
Refrigerate dough for at least an hour or overnight (I recommend overnight to its easier to roll out later)

When the dough is ready to use, roll it out to between ½ and ¼ inch thick. Now came the hard part of trying to cut it to look like Totoro since I don’t think they make cookie cutters shaped like Japanese cartoon characters haha Good thing my cousin is a pretty good artist so she was the one that did the cutting/shaping.

Once the cookies are cut, bake at 400 for about 8 min
Cool the cookies completely before icing them

Icing recipe also adapted from allrecipes... I doubled the recipe to make sure I had enough

-2 cups powdered sugar
-2 tbsp milk
-1 tbsp light corn syrup
-1/2 tsp almond extract

Mix all the ingredients together until you have the desired consistency.... if its too thick, add more milk and if its too thin, add more powdered sugar.

To make Totoro, you need 3 colors, white, black, and grey/light blue. White you already have, black food coloring you can buy at the store so the only color you actually have to make is the grey/light blue. There’s no exact recipe when making a color... its usually trial and error, this time, I used one drop of black and 2 drops of blue and it came out perfectly.

I used small spatulas to paint the larger parts... white for the body and grey/light blue for the head. For the eyes and black lines on the stomach, I put the icing into ziploc bags and cut a whole at the corner (ghetto piping haha) but it works! 


These cookies were definitely a lot of work... not sure if I’ll be making them again anytime soon haha
 

Monday, March 28, 2011

The Recipe That Started It All...

Double Chocolate Chip Cookies by Betty Crocker

-1 box Devil’s Food cake mix (Betty Crocker brand)
-1 stick of butter, softened
-1 tsp vanilla extract
-2 eggs
-1 cup chocolate chips

-Cream the butter with half of the cake mix
-Add the vanilla and eggs
-Add the rest of the cake mix and chocolate chips
-Drop spoonfuls of batter onto baking sheets
-Bake at 350 for 10-12 min


This recipe is what started it all, creating the baking fanatic I am today haha My first time baking on my own without my mom’s supervision was freshman year of high school. The recipe  looked easy enough since it calls for cake mix which already has the flour, sugar, baking powder, baking soda, etc prepped for you. So I whip everything up and put the cookies in the oven for 12 minutes, the amount of time the recipe calls for... but back when I was 14, I didn’t know the trick of underbaking and letting the cookies finish baking on the baking sheet outside of the oven so my first batch came out kinda crunchy with some burnt chocolate chips.. gross haha I was sad that my first solo baking adventure had failed and was sulking about it when my mom came home from work. Being the wonderful mom that she is, she ate my cookies anyway and told me they weren’t bad for my first time. She brought the rest to work to give to her coworkers who would eat anything because that’s what men do (so true haha). Then she gave me some tips about baking cookies (rotating them halfway through and underbaking)... I tried again the next day and brought them to school for my friends. These cookies made me popular in high school and for the next four years, people would always ask me to make these for them for their birthdays lol

In college, my apartment-mate also liked to bake and I would see her using different flavor cake mixes besides Devil’s food and other ingredients besides chocolate chips. My baking radar went off and I decided to do my own experiments. Some of my creations include: strawberry cake mix with yogurt chips, german chocolate cake mix with peanut butter chips, vanilla cake mix with pistachios. I even made funfetti cookies for my cousin’s birthday party and she asked me how much time I spent putting all those colors into the white cookies... so cute! haha What I love about this recipe is that you can be creative and mix and match whatever you want. This recipe definitely got me going and it’s a great beginner’s recipe for people new to baking. It’s also great when you need to whip something up and don’t have much time/all the necessary ingredients for those fancy shmancy recipes.

Please share any interesting combinations of cookies you end up making! :)

Sunday, February 27, 2011

Nutella: eating it, using it, measuring it

my favorite and go to snack in college was a nutella peanut butter sandwich. when i was only shopping for myself, i would buy the small tub but now that i’m back home... my parents like to shop in bulk which means costco. the best deal for nutella really is at costco... 2 large tubs (seen above) for like $7!!! they usually sell one of the small tubs for like $4 at safeway or any other grocery store... which is crazy expensive now that i think about it. so i had 2 large tubs sitting at home courtesy of my mom... but she was complaining that i wasn’t eating it fast enough and it was sitting on the shelf looking lonely. really mom?! i love her tho... she says the most random and weird things lol solution to my mom’s complaining: make cookies. these cookies have been a hit with family and friends... they’re crispy at the edges and soft/chewy in the middle. the nutella isn’t overpowering but it gives just the right amount of hazelnut flavor to the chocolate cookie.


Ingredients:
-1 1/3 cup flour
-1 tbsp unsweetened cocoa
-1/2 tsp cinnamon
-1/4 tsp baking powder
-1/4 tsp baking soda
-1/2 tsp of salt
-1/2 cup unsalted butter (1 stick), softened
-2/3 cup white sugar
-1/3 cup light brown sugar
-2/3 cup Nutella
-1/2 tsp vanilla
-1 egg
-1/2 cup semisweet chocolate chips

so you may be wondering how to measure nutella (or anything spreadable like peanut butter)... my mom recently got this nifty gadget called the metric wonder cup.  


the yellow tube can be adjusted to reflect however many cups ( or whatever measurements you’re using) you need. all you have to do is slide the yellow tube down to the line of whatever measurement you need and fill the empty space with whatever ingredient you need, in this case, nutella. once you fill the empty space, push the yellow tube to empty your ingredient into your mixer/mixing bowl. super easy! you can buy this on amazon for pretty cheap! 


Directions:
-sift together dry ingredients (flour, cocoa, cinnamon, baking powder, baking soda and salt)
-cream together butter and both sugars until light and fluffy
-add the nutella, vanilla, and egg
-add dry ingredient mixture in batches and mix until just incorporated
-add the chocolate chips.
-chill the dough for at least 1 hour before using
-drop tablespoons of dough onto lined baking sheets (i used a melon baller)
-bake at 350F for about 10 minutes until the edges look done (the middle can be slightly undercooked)
-let the cookies sit on the baking sheet for about 5 minutes to finish baking before removing them to cooling racks

recipe adapted from sugar cooking

happy nutella nom nomming!

Wednesday, February 16, 2011

Guys and white chocolate... a correlation?

White chocolate... not a fan but my friends on the other hand, LOVE it. I should also probably mention that most of my friends are guys and whenever I ask them what they want me to make for them, they always say white chocolate macadamia nut cookies... le sigh. every single time. Even when I offer them things like nutella chocolate chip cookies or red velvet cheesecake bars, they always default to white chocolate macadamia nut cookies... le sigh again. My “ugh” reaction to white chocolate isn’t the only reason I hardly ever bake these cookies, there are other reasons as well. There’s no stash of white chocolate at home so I have to specially go to the store to get some and they’re so much more expensive than dark or milk chocolate which I can’t understand for the life of me because white chocolate isn’t even real chocolate, its mainly cocoa butter and sugar. Macadamia nuts are also not cheap... small bag for almost $6 at Trader Joes. But I’m seeing my San Diego friends for the first time in almost 9 months so I’ll make these for their sake haha


Ingredients:
2 1/4 cups flour
1 tsp baking soda
1/2 tsp salt
1 cup (2 sticks) butter (softened)
1 cup packed light brown sugar
1/2 cup white sugar
2 eggs
2 tsp vanilla extract
1 cup chopped macadamia nuts
1 cup white chocolate chips (or 6 oz chopped white chocolate baking squares, see below)


- Sift together flour, baking soda, and salt in a bowl
- Cream together the butter and sugars until light and fluffy in another bowl (tip: cream the butter first, add the white sugar and cream until fully mixed before adding the brown sugar)
- Add the eggs and the vanilla
- Slowly add in the dry mixture, in about 3 batches, making sure each batch is fully mixed before adding the next one
- Add the white chocolate chips and macadamia nuts
- Chill dough in the refrigerator for at least an hour before using it (prevents the cookies from being too flat)
- Heat oven to 375 F
- Drop spoonfuls of dough about 1 inch apart on a baking sheet (tip: I use a melon baller... gives you more uniform looking cookies)
- Bake for about 9-12 min or until lightly golden brown (tip: I usually under bake them because they’ll still be baking on the cookie sheet once you take it out of the oven since its still hot)

I chose this recipe because it makes sturdy cookies, making them easy to pack when traveling which is just what I needed. But, they were still soft when biting into them which is a must because I can’t stand crispy cookies, they have to be chewy. I've actually swapped out the white chocolate for semi-sweet chocolate before... recipe is still good. Give it a try!